
Braces can feel a little mysterious, especially if you’re thinking about getting them for the first time. From the classic bracket braces to the modern invisible aligners, each type works differently and comes with its own unique process. Wondering how each one is fitted? We’ve got you covered!
Bracket braces: the traditional method explained
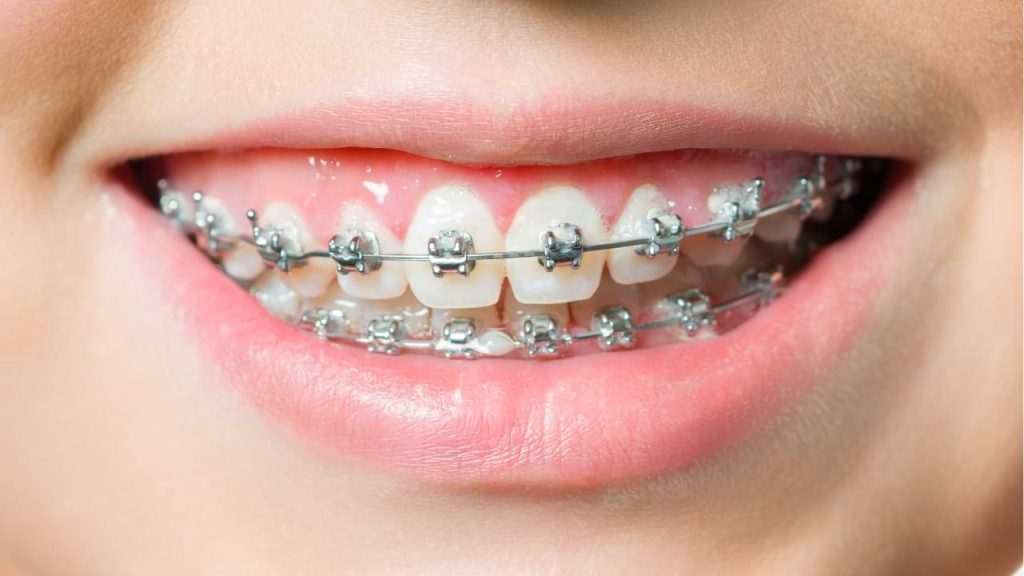
Bracket braces, also known as traditional metal braces, have been a popular method for straightening teeth for decades. When you think of braces, these are likely what come to mind. They consist of small metal brackets that are bonded to each tooth and connected by a thin metal archwire. But how exactly are they put on? Let’s break down the process:
Step 1: Thorough cleaning and preparation
Before anything is attached, your orthodontist will clean and dry your teeth to ensure there’s no plaque or debris that could interfere with the bonding process. This step is crucial, as it helps ensure the brackets will adhere securely to your teeth for the duration of your treatment.
Step 2: Applying bonding glue and positioning the brackets
Once your teeth are prepped, a small amount of special dental adhesive is applied to the center of each tooth. The orthodontist then carefully places the brackets on each tooth, one by one. These brackets are typically made of stainless steel, but you can also choose ceramic or clear brackets if you’re looking for a more discreet option. Each bracket is positioned with precision to ensure that it aligns with the intended tooth movement plan
Step 3: Setting the brackets with a curing light
After all the brackets are in place, your orthodontist will use a high-intensity curing light to harden the bonding glue, firmly securing the brackets. This process only takes a few seconds per tooth, but it ensures the brackets are fixed in place and won’t shift during the treatment.
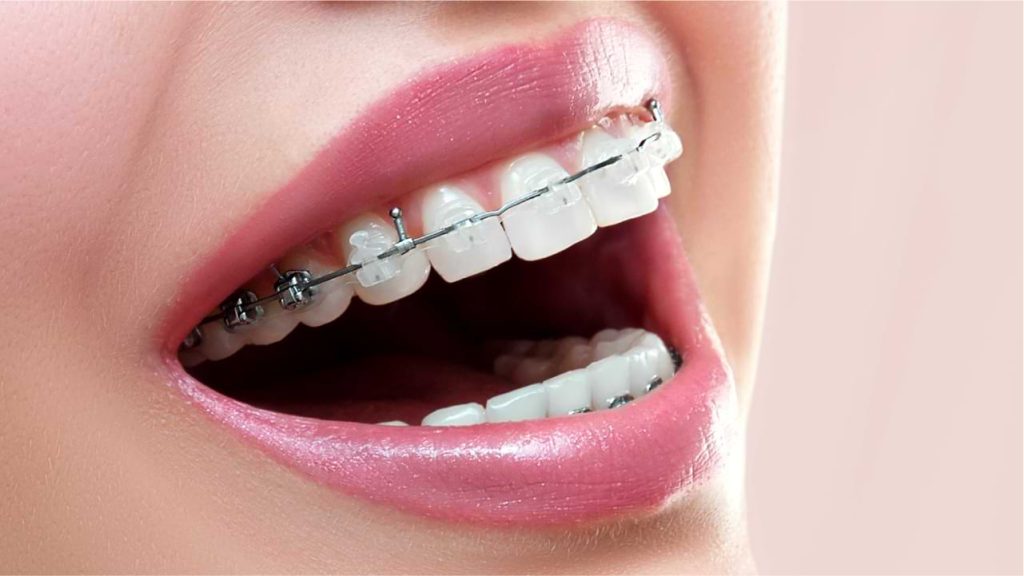
Step 4: Attaching the archwire and securing with elastics
With the brackets firmly bonded to your teeth, the orthodontist threads a thin metal archwire through the slots in each bracket. This archwire is what will apply the gentle pressure needed to guide your teeth into their new positions. To hold the wire in place, small elastic bands (also known as ligatures) are placed over the brackets. These elastics come in a wide range of colors, allowing you to add a personal touch to your braces if you’d like!
Braces rubber bands: adding extra force for alignment
As you move through your braces journey, your orthodontist might introduce rubber bands to the mix. These little elastics, often called “interarch” rubber bands, help fix more complex issues like overbites or underbites. Think of them as extra helpers that apply a bit more pressure to make sure everything shifts into place properly. They’re key in ensuring your teeth and bite end up aligned by the end of your treatment.
When do you start wearing rubber bands?
Not everyone with braces will need to wear rubber bands, and if you do, the timing will depend on your individual treatment plan. Your orthodontist will be the one to let you know if rubber bands are part of the plan and when to start wearing them. Some people begin from day one, while others might not need them until a few months into the process. It’s all tailored to what your teeth need!
How do you put elastics on your braces?
At first, getting the hang of rubber bands can feel a bit awkward, but don’t worry – you’ll be a pro in no time! Your orthodontist will show you exactly how to position them, but here’s a quick rundown to help:
- Wash your hands first: You don’t want any germs getting in there!
- Hook the elastic: Take one end of the rubber band and hook it onto the little metal piece on your bracket.
- Stretch it across: Gently pull the elastic over to the opposite bracket and hook it there. Keep your teeth close together while you’re doing this to make sure the band isn’t overstretched.
Your orthodontist will give you specific instructions on how long to wear them – usually most of the day and even while you sleep. Just remember, wearing them as directed is super important for getting the best results!
Clear aligners: a modern approach to an aligned smile
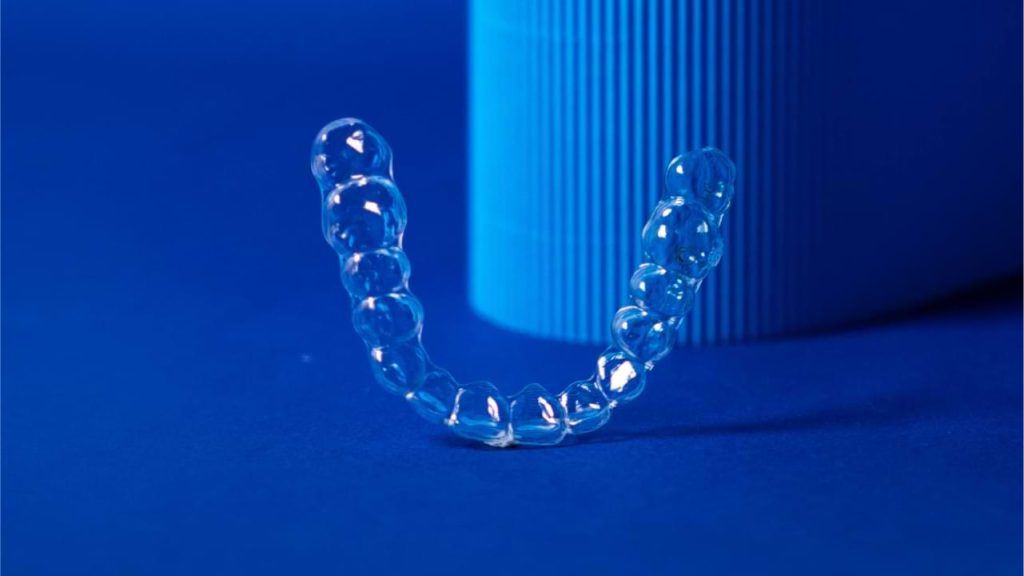
Clear aligners are a modern solution for achieving a straighter smile with minimal visibility. Unlike traditional braces, which use metal brackets and wires, clear aligners are virtually invisible, providing a discreet way to correct your teeth alignment. If you’re looking for a flexible, comfortable, and less noticeable option, clear aligners might be just what you need. Here’s a closer look at how they work:
Step 1: The initial assessment
Your clear aligner journey begins with a thorough assessment from your dentist or orthodontist. This includes a 3D scan or impressions of your teeth. These images are used to create a custom treatment plan that maps out how your teeth will shift over time. The digital model of your teeth is then used to create a series of aligners, each designed to move your teeth gradually towards the final result.
Step 2: Wearing your aligners
Once your custom aligners are ready, you’ll start your journey to a straighter smile. Here’s what to expect when wearing them:
- Comfortable fit: Clear aligners are designed to fit snugly over your teeth without causing irritation to your gums or cheeks. You’ll need to wear them for 20-22 hours a day for optimal results.
- Easy to remove: Unlike traditional braces, clear aligners are fully removable, which means you can take them out when eating, brushing, or flossing. This flexibility helps you maintain better oral hygiene and enjoy your meals without restrictions.
Switching aligners: Every 1-2 weeks, you’ll switch to a new set of aligners. Each new set is designed to apply gentle pressure, gradually moving your teeth closer to their final positions as laid out in your treatment plan.
Step 3: Monitoring progress
Throughout your treatment, your dentist or orthodontist will monitor your progress, often through regular check-ins. With systems like Zenyum’s, you can even track your progress remotely using an app, which makes it incredibly convenient for busy schedules. The aligners will gradually shift your teeth closer to the ideal alignment over several months to a few years, depending on your unique case.
Step 4: Maintaining the results
Once your treatment is complete, your dentist will likely recommend wearing a retainer to keep your teeth in place. This helps maintain the results long-term and prevents your teeth from shifting back to their original positions.
- Types of retainers: There are different types of retainers, including fixed (permanent) retainers and removable ones. Your dentist will advise you on the best option based on your specific needs. Fixed retainers are bonded to the back of your teeth and are not visible, while removable retainers can be taken out for eating and cleaning.
Wearing schedule: Initially, you may need to wear your retainer full-time, but over time, your dentist might suggest transitioning to part-time wear, such as nights only. This gradual adjustment helps your teeth stay in place without putting unnecessary strain on your routine.
Why choose Zenyum Invisible Braces?
Zenyum takes the clear aligner process one step further by making it convenient, affordable, and super user-friendly. Here’s a quick overview of the Zenyum process:
1. Begin with a FREE Smile Check
Start by submitting four pictures of your teeth. This quick and simple process allows Zenyum to perform a complimentary smile evaluation to determine if clear aligners are a good fit.
2. Visit the dentist or orthodontist
If Zenyum Invisible Braces are a good fit, you will then head to our partner clinic for a thorough dental examination. This visit includes 3D scans, X-rays, and a detailed assessment to create a personalized treatment plan.
3. Review and approve the treatment plan
Once the treatment plan is ready, review it with your dentist. This is your chance to ask questions and ensure the plan meets your expectations before giving your approval.
4. Fitting appointment
Schedule a fitting appointment where you will get to try on your custom aligners. The dentist or orthodontist will check the fit and make any necessary adjustments to ensure comfort.
5. Monitor progress with the Zenyum app
As treatment progresses, use the Zenyum app to track your journey. The app provides reminders, updates, and an easy way to connect with the support team if needed.
Ready to start your clear aligner journey? Take the first step with Zenyum’s free Smile Check and see how easy it can be to achieve a straighter smile!
Lingual braces: discreet and effective from behind
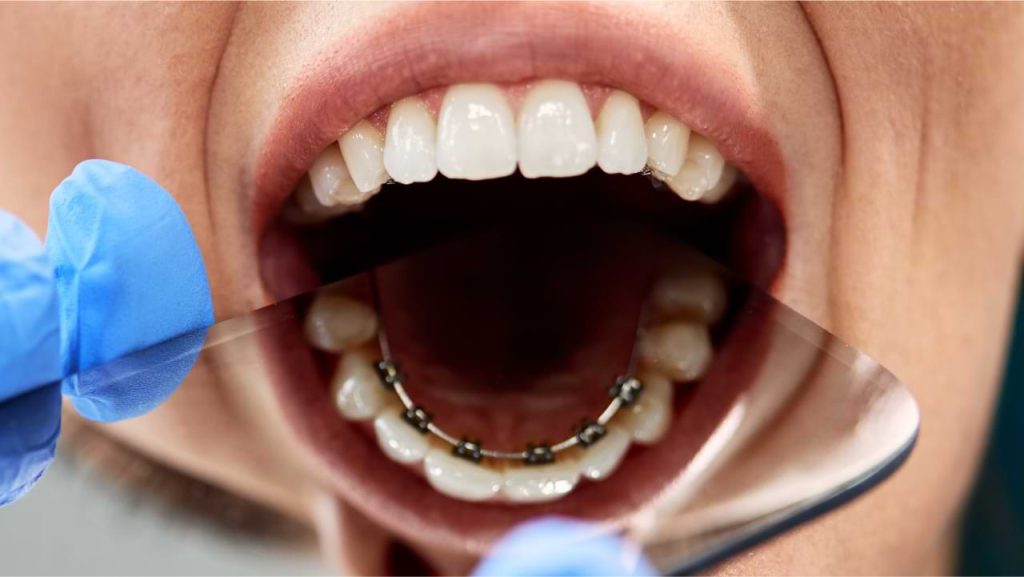
Lingual braces offer a unique approach to orthodontics by placing the brackets and wires on the back of your teeth, making them virtually invisible from the front. Here’s a detailed look at how lingual braces are put on:
Step 1: Comprehensive cleaning and preparation
Just like with traditional braces, the first step is to thoroughly clean and dry your teeth. This ensures that there is no plaque or debris that could affect the adhesive bonding of the brackets.
Step 2: Custom-fitting the brackets
Lingual braces require precise customization because they are attached to the inner surfaces of your teeth. Your orthodontist will take detailed impressions or digital scans of your teeth to create custom-made brackets that fit perfectly. Once ready, these brackets are carefully placed on the back of each tooth using a special bonding adhesive.
Step 3: Securing the brackets with a curing light
Once all the lingual brackets are in position, the orthodontist uses a curing light to harden the bonding adhesive. This process ensures that the brackets are securely fixed in place and ready to work on realigning your teeth.
Step 4: Attaching the archwire and adjusting
A thin metal archwire is then threaded through the slots of the lingual brackets. This wire is what will apply the pressure needed to move your teeth into their correct positions. Unlike traditional braces, lingual braces often use a more complex wire system that requires precise adjustments to ensure effective treatment. Your orthodontist will make these adjustments during regular check-ups to fine-tune the pressure applied by the archwire.
Self-ligating braces: innovative design for less maintenance
Self-ligating braces are a modern advancement in orthodontics designed to simplify the treatment process and enhance comfort. Unlike traditional braces, these braces don’t require elastic bands to hold the archwire in place. Here’s a closer look at how they work:
Step 1: Initial cleaning and preparation
The process starts with thoroughly cleaning and drying your teeth, just like with other types of braces. This step ensures that the brackets will bond securely to your teeth.
Step 2: Placing the self-ligating brackets
Self-ligating braces use a specialized bracket design that features built-in clips or doors to hold the archwire in place. Your orthodontist will attach these brackets to your teeth using a bonding adhesive. The brackets are carefully positioned to align with your treatment plan.
Step 3: Using a curing light
After the brackets are positioned, a curing light is used to set the bonding adhesive, ensuring the brackets stay firmly attached throughout your treatment.
Step 4: Inserting the archwire and making adjustments
The archwire is inserted into the slots of the self-ligating brackets. Since these brackets have clips or doors to secure the wire, there’s no need for additional elastic bands. This design reduces friction and can make adjustments less frequent and more comfortable. Your orthodontist will adjust the wire and brackets as needed during your regular visits to ensure effective tooth movement.
Additional tips when wearing any type of braces
No matter which type of braces you go for, these general tips can help you ensure a smooth and successful journey:
Maintain good oral hygiene
Braces create extra surfaces for food particles and plaque to cling to, making diligent oral care essential. Here’s how to keep your teeth and gums in top shape:
- Brush regularly: Use a soft-bristled toothbrush and fluoride toothpaste to brush after every meal. Focus on cleaning around the brackets and wires to remove any trapped food.
- Floss daily: Flossing is crucial to reach areas between your teeth and braces that a toothbrush can’t easily access. Consider using orthodontic floss or a floss threader to make the process easier.
Use mouthwash: An antimicrobial mouthwash can help reduce plaque and prevent gum inflammation. Rinse daily to complement your brushing and flossing routine.
Visit your orthodontist regularly
Regular check-ups with your orthodontist are vital for:
- Adjustments: Your orthodontist will make necessary adjustments to your braces, such as tightening the wires or changing the elastics, to ensure your teeth are moving as planned.
- Monitoring progress: Routine visits allow your orthodontist to track the progress of your treatment and address any issues that may arise.
Addressing concerns: If you experience discomfort or problems with your braces, your orthodontist can provide solutions and adjustments during these visits.
Patience is key
Straightening your teeth is a gradual process, and achieving your desired results takes time. Here’s how to stay on track:
- Follow instructions: Adhere to your orthodontist’s guidelines regarding wear time, adjustments, and care for your braces. Consistency is crucial for achieving the best results.
- Manage expectations: Understand that progress may be slow and varies for everyone. Regularly remind yourself of the benefits and final outcome to stay motivated.
Stay positive: Maintaining a positive attitude will help you stay committed to your treatment plan and embrace the journey toward a healthy, aligned smile.
Choosing the right braces for your smile
Choosing the right type of braces is a big step towards achieving a healthy and bright smile. Whether you opt for traditional bracket braces, lingual braces, or flexible clear aligners, each option has its own benefits and process. By understanding how each type works and following essential care tips, you can ensure your treatment is effective and comfortable.
Remember, maintaining good oral hygiene, keeping up with regular orthodontist visits, and being patient throughout the journey are key to getting the best results. And if you’re ready to start your braces journey, give Zenyum a try. With our streamlined process and free Smile Check, we’re here to help you every step of the way. Discover how our clear aligners can fit seamlessly into your lifestyle and set you on the path to a confident, radiant smile.

Eager to give yourself a new smile you’ll love?
Discover how Zenyum’s clear aligners can provide you a discreet and effective path to a confident, radiant smile.